Font Installation Procedures
All barcode fonts require a 2-step installation process:
- Install the barcode font. To do this, extract the fonts from the downloaded zip file and refer to the font specifications in the User Manual to determine which font to install. To install the font, refer to the examples below. Organizations that use GPO may refer to the Barcode Font GPO Deployment for Windows Example to install the font.
- Implement a Font Encoder in the desired application. A font encoder is required for all barcode types except Code 39 and Codabar. Font encoders convert the data that is to be encoded into a text string that will generate the correct symbol when combined with the barcode font. Popular user-licensed font encoders are included in the package; Developer-licensed encoders are in a separate download file that is provided with all Developer License orders.
Windows 7 and above TrueType (TTF) or OpenType (OTF) Font Installation
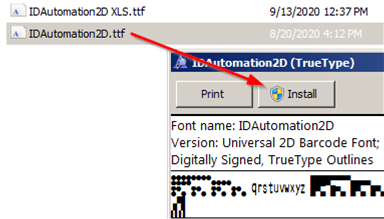
Open the font that you want to install. You should see a font dialog with a font preview. This area may contain symbols instead of characters that are used to generate barcodes. Choose Install. You may also right-click on the font file and choose Install.
NOTE: Do not install both TTF and OTF fonts with the same font name on the same system.
Mac OS X 10.3 and above TrueType or OpenType
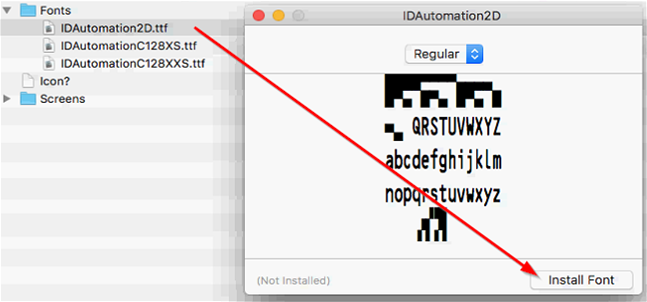
Open the font file and choose the "Install font" button at the bottom of the font preview.

NOTE: Do not install both TTF and OTF fonts with the same font name on the same system.
Web Font Installation (Web Open Format WOFF | WOFF2)
WOFF Web Fonts are provided with all Developer Licensed font packages. To enable dynamic barcode generation, web fonts, HTML5, CSS, and JavaScript may be used. Installation is demonstrated on the WOFF Barcode Web Font page.
Other Operating Systems:
Additional Font Installation Procedures:
- Windows TrueType Font Installation
- Windows PostScript Font Installation
- How to Extract
Zip Files in Windows
- Unix and Linux Font Installation Examples
- Distributing Barcode Fonts with a Custom Windows Application
- Mac Barcode Font Installation Procedures Prior to OSX
- Installing Fonts on UNIX for Oracle Reports
- IDAutomation
Fonts in AFP, Xerox FNT or Metacode Formats
- BeOS TrueType Font Installation
- Installing PCL Fonts on any OS
- Pocket PC
- Distributing Fonts or Other Components with Custom Applications
- Distributing fonts with a custom application
IDAutomation can assist with font installation on Windows and Mac systems. Assistance for font installation on other operating systems is limited. In some products, such as the .NET Standard Font Encoder, examples are provided in the product download.

