Streaming Barcode Images with MySQL and PHP
This tutorial describes how to use the Dynamic Barcode Generator Service in a webpage that connects to a MySQL database. The demonstration follows an event ticket printing company that wants to allow event attendees to generate and print the tickets by entering information into a form. The company also wants to conform to the latest ticket standards, which require a barcode on the ticket. The switch to barcode technology makes it easier for gate attendants to process barcode tickets and prevent extremely long lines for event attendees.
When the event attendee enters the email address into an HTML form and chooses to submit, the ticket is created through PHP by accessing a MySQL database that contains the ticket data (previously inserted during ticket purchase).

PHP code accesses the database and pulls the record for the searched item.

The values are pulled from the ticketnum (ticket number) and seatnumber (seat number) fields and are set to the Dynamic Barcode Generator Service parameter that generates the barcode.

Barcode Image Streaming Tutorial
Applications Used in the Tutorial
- IDAutomation Dynamic Barcode Generator Service (Linear Barcode Example)
- MySQL 5.5.24
- Text Editor for HTML and PHP
- WAMP (LAMP for LINUX users)
NOTE: The tutorial illustrates how to pull the data from the database and set it to the Dynamic Barcode Generator Subscription parameter. Though the tutorial describes how to set up the database and populate it with purchaser data, it assumes that the purchaser has already purchased a ticket to the event. The image that displays as the Quicker Ticket logo and the image on the ticket are not touched on. The tutorial commences after the WAMP installation and suggests that the user is familiar with WAMP and MySQL.
Project Set up
- Navigate to the www folder in the
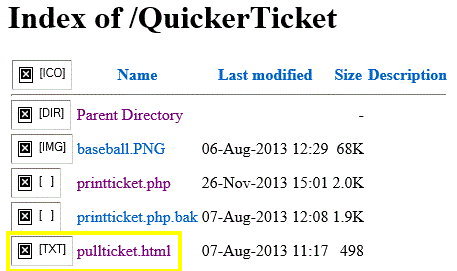
WAMP directory and create a project folder. The image below displays a project folder named QuickerTicket.
- Open a text editor, such as UltraEdit.
Create and save an HTML file named pullticket.html in the project directory. Pullticket acts as the form to input the purchaser's information.
- Create and save a PHP file named printticket.php in the project directory. Printticket pulls the information from the database and generates the ticket.
Database Set up
- Start-up WAMP.
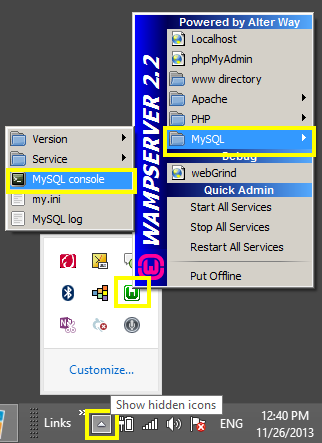
- Left-click the Show hidden icons in the taskbar, left-click the
WAMP icon,
hover over MySQL, and select MySQL console.

- MySQL may require login information such as a username and password. If
required, enter the information. If not set up, bypass the username and
password by pressing the Enter key.
- Create a database with the command CREATE DATABASE [database
name] or use MySQL's pre-designed database named test. Access the
database with the USE [database name] command, such
as USE test;
- Create a table and fields with the command CREATE TABLE [table
name] (field1, field2, field3,...);. The Quicker Ticket example creates a
table named tickets with four fields:
CREATE TABLE tickets (ticketnum INT(11), name VARCHAR(20), email VARCHAR(30), seatnumber INT(4)); -
Set the desired field to the primary key. The Quicker Ticket example sets ticketnum as the primary key with:
ALTER TABLE tickets MODIFY ticketnum INT PRIMARY KEY AUTO_INCREMENT; - To insert entries into the database, use the command INSERT INTO
table name (column1, column2, column3,...) VALUES (value1, value2, value3,...);
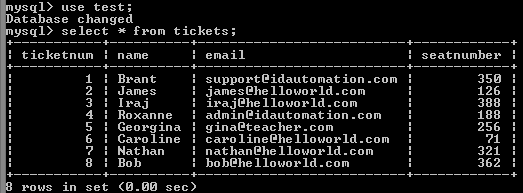
INSERT INTO tickets (name, email, seatnumber) VALUES ('Brant', 'support@idautomation.com', 350);
Create the HTML Form
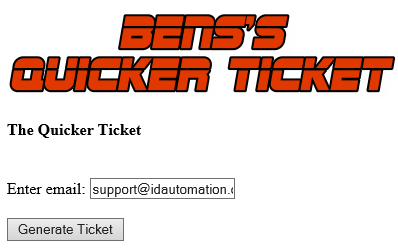
- The HTML form handles the email address input through a text box and the submit button, which passes the information to the PHP file. Open the pullticket.html file
and enter the code:
<html>
<body>

<h4> The Quicker Ticket</h4>

<!--Action to execute printticket.php page after submission-->
<form action = "printticket.php" method="post">
<br>

<!--Text box to enter the email address-->
Enter email: <input name = "email" type="text"/>
<br>

<!--Submit button to run printticket.php -->
<input type="submit" value="Generate Ticket"/>
</form>
</body>
</html> - Save the file.
Create the PHP File
- The PHP file processes the form input, calls a search to the MySQL
database, and returns the data to the Dynamic Barcode Generator. Open the printticket.php, enter
the code, and save the file.
<html>
<body>

<?php
//Sets the value of the given configuration option.
ini_set( 'error_reporting', E_ALL ^ E_NOTICE );
ini_set( 'display_errors', '0' );
?>

<?php
$host="localhost"; // Host name
$username=""; // MySQL username
$password=""; // MySQL password
$db_name="test"; // Database name
$tbl_name="tickets"; // Table name
?>


<?php
// Connect to server and select database.
mysql_connect("$host", "$username", "$password");
mysql_select_db("$db_name")or die("Can't select database.");


//Get email from form, set to $email.
$email = mysql_real_escape_string($_POST['email']);

//Collects data from table
//Selects record from table where it equals form input
$query = "SELECT * from tickets WHERE email = '$email'";

$result = mysql_query($query) or die (mysql_error("Could not find ticket."));


//Returns an associative array that corresponds to
//the fetched row and moves the internal data pointer ahead
while($row = mysql_fetch_assoc($result)) {
//Sets ticketnum and seatnumber to $datatoencode
$datatoencode = $row['ticketnum'] . "-" . $row['seatnumber'];
//Sets name in record to $name
$name = $row['name'];

//Sets seatnumber in record to $seatnumber
$seatnumber = $row['seatnumber'];
}
?>

<?php
//Close connection
mysql_close();
?>

<!--Creates ticket stub-->
<br>
<div style="width:250px;height:500px;border:2px solid #000;align="center">
<div align="center">


<!-- The Dynamic Barcode Generator Service URL is
placed within the ticket area. The $datatoencode variable is comprised of the
ticketnum and seatnumber fields that are passed to the D (DataToEncode)
parameter.
<img src ="https://www.bcgen.com/demo/linear-dbgs.aspx?D=<?php echo $datatoencode
?>">
<br>

<!--Additional Ticket/Game Information-->

<h3> Bruzas Penguins at Schubert Snakes</h3>

<h4>Game Time:</h4>
<h4>Saturday August 17, 2013 1:00PM</h4>
Seat: <?php echo $seatnumber?>
<br>

<img src="baseball.png">
</div>
</div>

<br>
<form action = "pullticket.html" method= "post">
<input type="button" value="Print Ticket"
onClick="window.print()"/>
</form>
</html>
</body> - Save the file.
Run the Project
- Left-click the Show hidden icons in the taskbar, left-click the
WAMP icon,
hover over MySQL, and select Localhost.
-
Select the QuickerTicket project folder.
- Select the pullticket.html to run the project.

-
Enter the email in the text box

-
Select the Generate Ticket submit button and a ticket is generated.

If a scanner is needed, consider purchasing the IDAutomation USB Barcode Scanner with DataBar.

