

Power BI | SSRS | QR Code with Logo in the Middle Implementation Tutorial
This tutorial describes how to use the Enhanced QR Code with a Logo in the middle in Power BI, formerly SSRS. The result is a branded QR Code with an embedded logo. This requires Power BI Report Builder (formerly SSRS Report Builder) or, when using Visual Studio, Microsoft RDL Report Designer, or Visual Studio with "Reporting Services Projects" Extension.
This functionality is provided with IDAutomation's QR Code Enhanced version of the Dynamic Barcode Generator SaaS or a local streaming EXE that is provided with the .NET Generator. This same functionality is also provided in the Linear + 2D version of the Streaming Barcode Server for IIS.
Power BI SSRS QR Code with Logo Tutorial
- Download the Power BI SSRS QR Code Logo Streaming Download and extract the files.
- Open the IDAutomation_SSRS_PowerBI_QRCodeLogoStreamingExample.rdl file in Report Builder. This example displays a QR Code with the free demo version of the IDAutomation Dynamic Barcode Generator SaaS, which contains an intermittent watermark in the barcode and a rate limiter of about 10 symbols per minute. The licensed version does not contain these limitations. The download also contains a IDAutomation_Local_SSRS_PowerBI_QRCodeLogoStreamingExample.rdl report that was set up to use barcodes from a local streaming EXE that is provided with the .NET Generator.
- Choose to run the report and verify that a QR Code Symbol appears.
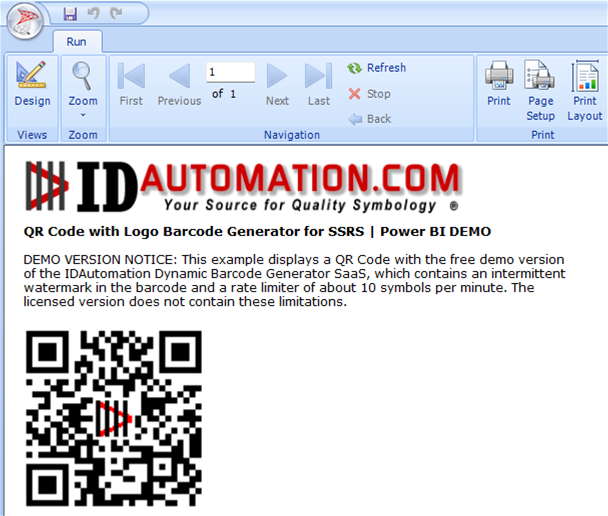
- Switch to Design View, Right-Click on the symbol, choose Copy, and paste it into the report that needs the barcode. Alternatively, if copy and paste does not work, do the following to set up a streaming image in your report:
1. In Design View, choose Insert Image.
2. In the Image Properties - General, for Image Source choose External, select the Formula button, and enter:
="http://www.bcgen.com/qrenh/idautomation-qrenh?&LS=.21&Q=1&X=4&D=" & "Thank_You_For_Choosing_IDAutomation.com" - After the report shows the QR Code image, choose Image Properties - General - Source - External and select the Formula button.
- Modify the parameters if necessary and change the & "Thank_You_For_Choosing_IDAutomation.com" to connect to your database field, for example:
D=First(Fields!Sku.Value, "DataSet1") - In a large dynamic report, only the first 10 or so fields will display because of the limitations of the demo version.
- After licensing one of the compatible products (shown below), such as the SaaS Dynamic Barcode Generator Service or the local streaming EXE, modify the "http://www.bcgen.com/qrenh/idautomation-qrenh" URL to be the URL of the licensed version.
- This tutorial was created with SSRS Report Builder 2008 R2, which does not accept a URL that begins with https. Therefore, make sure you change https to http in the custom URL if the version of Report Builder you are using does not support https. For this reason, if sensitive data is being encoded in the barcode, IDAutomation recommends using the Local streaming EXE option.
- To place your own custom branded logo in the QR Code center, either send the logo to IDAutomation when using the SaaS option, or when using the local EXE or IIS implementation, place the logo in the "logos" folder and specify the filename with the LOGO= parameter.
- If the barcode symbols do not appear as expected, use the example provided to perform a process of elimination to find the issue. If the symbol does not scan, it will be necessary to either make the logo smaller in the symbol or increase the error correction to Q or H.
Compatible with the following products
- .NET Streaming API | A streaming EXE is provided in this package | Available in 2D or Linear +2D versions
- SaaS Dynamic Barcode Generator Service | No software to install with this version | Available in QR Code Enhanced version
- Streaming Barcode Server for IIS | A streaming EXE is provided in this package | Available in the Linear +2D version
