JavaScript Barcode Generator User Manual
- JavaScript Integration Tutorial
- Apache Cordova Example
- GS1 Encoding
- Generating HIBC and ISBT
- Barcode Properties
- PDF417 Example
- Support
- Related products
- Product Update: QR Code now includes new built-in support for Auto Mode, UTF-8 Encoding, TLV and Base64, Swiss QR-Bill, Center Override, and GS1 QR Code. Data Matrix includes a faster and more efficient auto-encoding algorithm and supports GS1 and UTF-8.
Buy License Support Download Demo Release Log
JavaScript Integration Tutorial
The Native JavaScript Barcode Generator may be utilized in any environment supporting JavaScript or HTML5.
- Extract the files from the installation package.
- Several generator files are provided for different barcode types (Symbologies)
and purposes. Use the file that represents the symbology that is needed. This tutorial will use the Code 128 symbology,
which is in the file named
IDAutomation_JavaScriptBarcode_C128.js.
HTML example files are also provided and may be referred to as necessary.
Additional files are also provided for various purposes:- symbology.js - the primary compressed file to use in production that generates several image types, including SVG, BMP, and HTML5, and offers several symbology options.
- symbology.uncompressed.js - the uncompressed source code of the primary file.
- symbology.svg.js - this is a compressed file used in production when only SVG is required.
- symbology.svg.uncompressed.js - the uncompressed source code of the SVG generation file.
- Open the application or IDE where the barcode is to be integrated.
- Add the following line at the top of the file just before the
</head>
line to load the appropriate JavaScript file:
<script language="JavaScript" src="IDAutomation_JavaScriptBarcode_C128.js"></script>
- Add a script where the barcode is to appear, which is the file name
without the ".js":
<script type="text/javascript">
    document.write(IDAutomation_JavaScriptBarcode_C128(DataToEncode))
</script> - Modify "DataToEncode" to equal what is to be encoded in the barcode. This may be accomplished with a variable, a
dynamically generated webpage, or another product such as jQuery, which
is used in this code example:
<div id="SVG_Barcode"> </div>
<script type="text/javascript">
   $(document).ready(function() {
   $("#encode").click(function(e) {barcodetext = $("#datatoencode").val();
   $("#SVG_Barcode").html(IDAutomation_JavaScriptBarcode_C128(barcodetext));
   });
});
</script>
jQuery is also used with the HRI object from this product in the GS1 Element String HRI Verification Tool.
- If the default image type of SVG is not supported well within the application, the ReturnType parameter may be changed to try other images. Other Barcode properties, such as the bar height and X dimension, may be changed if necessary.
- Print or display the result to verify that the barcode is generated. If a scanner is needed to verify barcodes, IDAutomation offers several barcode scanner kits. It is normal to view some distortion of the barcode on the screen because of low screen resolution. However, the barcodes should be accurate when printed or viewed on high-resolution screens.
Example for Apache Cordova | Adobe PhoneGap
The Native JavaScript Barcode Generator is fully compatible with Apache Cordova, and Apache Cordova can be used in Visual Studio. The following is an example of utilizing Adobe PhoneGap.
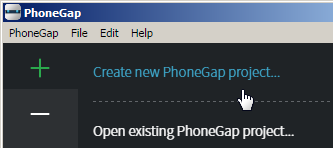
- Download and install PhoneGap desktop.
- Create a new project or open an existing project.

- After a working project is created, the barcode generator may be integrated into the app.
Note: IDAutomation does not support the installation and setup of PhoneGap; please use the tutorials provided by Adobe by choosing Help-Tutorials. - Copy the symbology-specific barcode generation JavaScript file to the \project\www\lib folder. In this example, IDAutomation_JavaScriptBarcode_QRCode.js is used.
- Edit the appropriate HTML file where the barcode is needed. In this example, \project\www\index.html is edited.
- Follow the JavaScript Integration Tutorial above from step 4, which will add the generator to the HTML file. In
this example, the following lines of code are used to integrate jQuery
with the barcode component to place an SVG image in the id element:
<script src="lib/jquery.min.js" type="text/javascript"></script>
<script language="JavaScript" src="lib/IDAutomation_JavaScriptBarcode_QRCode.js"></script>
...
<div id="qrcode1">
...
<script src="cordova.js" type="text/javascript"></script>
<script>
    $(document).ready(function() {
    $("#encode").click(function(e) {barcodetext = $("#datatoencode").val();
    $("#qrcode1").html('');
    IDAutomation_JavaScriptBarcode_QRCode(barcodetext, null, null, null, null, null, null, null, null, "qrcode1");
   });
});
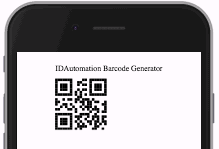
</script> - Install the PhoneGap Developer App on a mobile device and verify the app works as intended.

Barcode Properties
Barcode properties may be modified within the top of the referenced .js file or by a function parameter.
Function Parameter Example:

Top of the .js file Example:

The following is an explanation of popular properties:
- XDimensionPoints - This is the X dimension in pixels. Because the barcode is drawn in HTML5, each pixel is about 10 mils or .026 cm. Refer to the Web Browser Barcode Resolution FAQ for more information and how to achieve a precise X dimension that is not in increments of 10 mils or .026 cm.
- BarHeight - The height of the bars in pixels. Each pixel is about 10 mils or .026 cm.
- ReturnType - The ReturnType parameter may be changed to return images other than the default.
This may be necessary if the image does not produce the desired result.
- 0 = SVG (Default).
- 1 = BMP Image; when the X Dimension is set to 1, the BMP images may appear to have clearer HR text.
- 2 = HTML5 Canvas; HTML5 images may appear blurry on some devices when XDimensionPoints is a number less than 3.
- 3 = Font Image; generates a symbol from text using a mono-spaced system font using Unicode Image. This may be necessary when the other image options do not work in your environment. XDimensionPoints will need to be increased to about 6 or 8 when using this option.
- ApplyTilde - Processes the tilde character for special functions such as encoding functions, encoding ASCII characters directly, or generating GS1-128, GS1-DataMatrix, or GS1-QRCode symbols.
- IDElement - is an optional parameter that can place the returned image into the referenced div ID element.
<div id="html5_barcode"></div>
...
<script type="text/javascript">
   document.write(IDAutomation_JavaScriptBarcode_C128("123456789012", , , , , , , 'html5_barcode'));
</script> - GS1 Encoding Options - The FNC1 may be encoded with ~202 in Code 128 and ~1 in GS1-DataMatrix or GS1-QRCode when the tilde option is enabled. The FNC1 may also be encoded by surrounding the AI in parentheses in Code 128. The first FNC1 is automatic with UPC, EAN, and DataBar barcode types.
- HRI Options - When using the HRI object, multiple GS1 fixed-length element strings are automatically displayed.
Examples:
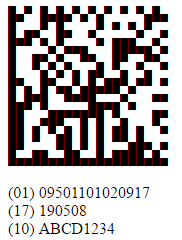
GS1-128 encoding: ~20201095011010209171719050810ABCD1234

GS1-DataMatrix or GS1-QRCode encoding: ~101095011010209171719050810ABCD1234

- Tilde & MOD Options -
enabling ApplyTilde or ProcessTilde will allow the following modulus calculation options, where ??
is the number of digits before the tilde to include in the calculation:
- ~m?? calculates a MOD10 check character, commonly
used for GS1.
Example: ~2020000801234999999999~m17
Encodes: (00) 008012349999999997 - ~f?? calculates a MOD43 check character, commonly used for HIBC.
Example: +A123BJC5D6E71~f14
Encodes: +A123BJC5D6E71G - ~i?? calculates a MOD37-2 check character,
commonly used for ISBT.
Example: G123412654321~i13
Encodes: G123412654321L - ~k?? calculates a MOD37-2 check character in brackets,
commonly used for ISBT manual entry. This option will not encode the check
character within the barcode and should only be used with the
HRI object.
Example: G123412654321~k13
Displays: G123412654321 [L] - ~CO in QR Code enables Center Override, commonly used for the Swiss QR Bill, to change the center of the symbol.
- TLV Base64 - In QR Code, when the first character is | then automatically encode TLV values separated by | in Base64, for example:
Example: DataToEncode = "|SellerName|VNumber|DateTime|Total|VTotal" - TLV - In QR Code, when the first two characters are ^| then automatically encode TLV values separated by |
- Base64 - In QR Code, when the first character is = encode the DataToEncode in Base64, excluding the =
- ~m?? calculates a MOD10 check character, commonly
used for GS1.
- Tilde ASCII Encoding - ASCII functions and characters may be directly encoded with ~??? in Code 128 and ~d??? in Data Matrix and QR Code, where ??? is a 3-digit number of the ASCII code.
PDF417 Barcode Example
Place the example in an HTML file, and ensure the JS file is within the project. For more information, please visit The PDF417 JavaScript Generator.
<!DOCTYPE html>
<html lang="en">
<head>
    <meta charset="UTF-8">
    <meta name="viewport" content="width=device-width, initial-scale=1.0">
    <title>Barcode Demo</title>
    <script src="IDAutomation_JavaScriptBarcode_PDF417.js"></script>
</head>
<body>
    <div id="barcode-container">
        <script>
          document.write(IDAutomation_JavaScriptBarcode_PDF417("some test data"));
        </script>
    </div>

    <style>
        #barcode-container pre {
          width: 100% !important;
          max-width: 500px;
          overflow-x: auto;
          padding: none;
        }
        #barcode-container{
          width: 200px;
        }
    </style>
</body>
</html>
Support
Free product support may be obtained by reviewing the public JavaScript forum threads. Priority phone, email, and forum support are also provided via several contact methods within 30 days of purchase. Support after this complimentary period may be received with an active Level 2 Support & Upgrade Subscription.
Common Support Solutions:
- If scanning problems are encountered with printed output, verify the barcode symbol is not truncated and that a printer of 600 DPI or greater is being used. A larger X Dimension may be used with low-resolution printers to create more accurate symbols. If the proper resolution cannot be achieved, IDAutomation also offers many barcode fonts that print well on low-resolution printers.
- The Font Image option may be used to display a barcode image in a text box or field. In this case, the font selected for the text object should be "Courier New", "Lucida Console", or another mono-spaced
Unicode font. Additionally, ensure the barcode fits the object. If the width of the barcode is larger than the object, several white lines may appear.

Related Barcode Software Products:
IDAutomation.com also provides several other barcode products for easy integration with Web Applications. A few of these products include:
- ASPX Barcode Generator Script - creates barcodes from ASPX scripts.
- Hosted Barcode Services - allow dynamic creation of barcodes without installing any software.
- Java Servlets and Applets - generate barcodes on any operating system.
- Bcgen.com - generate free barcodes online one at a time.

