LibreOffice & OpenOffice Tutorial
This tutorial describes how to use IDAutomation's barcode fonts in Apache OpenOffice and LibreOffice by The Document Foundation. The solutions described here are compatible with LibreOffice 5, OpenOffice 4.0, and Star Office 8.
- Prepare OpenOffice for the use of barcode fonts
- Barcode Creation in Calc
- Barcode Creation in Base
- Barcode Creation in Writer
- Streaming Barcode in LibreOffice
- Streaming Barcode in OpenOffice
- Download macros (includes VB source code and examples)
- Symbologies included in barcode macros
- It is important to have the ability to test printed barcodes with a barcode scanner. If a scanner is not available for testing purposes, IDAutomation sells high-quality complete barcode scanner kits.
- Video Tutorial on How to Create Barcodes in Open Office Calc
Prepare Office for the Use of Barcode Fonts
The following will prepare LibreOffice and OpenOffice applications such as Calc, Base, Impress, or Writer for use with IDAutomation's barcode fonts.
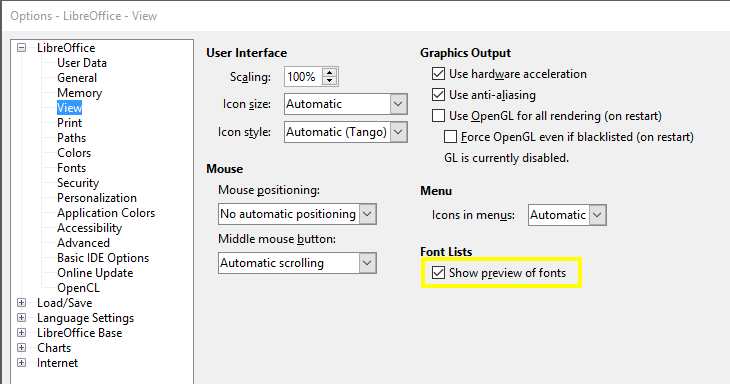
- The default method in these Office applications is to display font names in their own font as a preview. This works well for text fonts; however, barcode fonts viewed this way make it difficult to pick the correct option. To allow viewing
of barcode font names in Calc, Base or Writer choose Tools - Options
- View, deselect the "Show Preview of Fonts" checkbox, and choose OK. The program will need to be closed and reopened for this change to take effect.
- The additional items below do not have to be performed when
using the Code
39 Barcode Fonts. If a checksum is required for Code 39 or another barcode type is needed, perform the steps below to install the macros.
These macros will reformat the data to the barcode fonts and handle
any required checksum calculations.
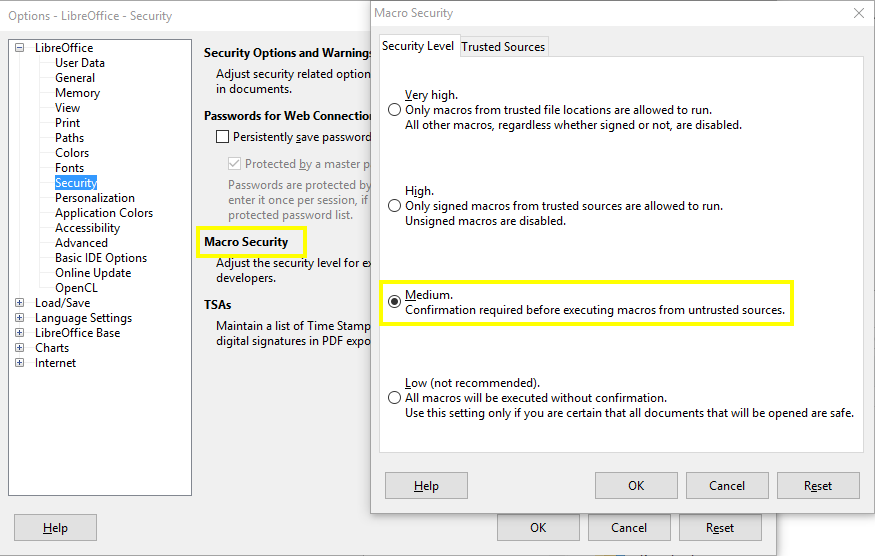
- By default, the Macro Security Level is set to Medium, which gives the user the option to confirm if a macro is to run. To verify this setting choose Tools - Options - Security - Macro Security and
to confirm the
level is set to Medium and choose OK.
-
Download and extract the IDAutomationVB.bas file.
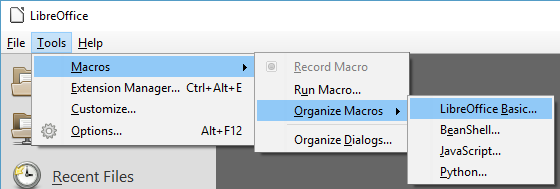
Note: With all 2D font packages, such as QR-Code and Data-Matrix, the .bas file will reside in the Integration\OpenOffice VB folder of the product zip file. - Choose Tools - Macros - Organize Macros - LibreOffice Basic.
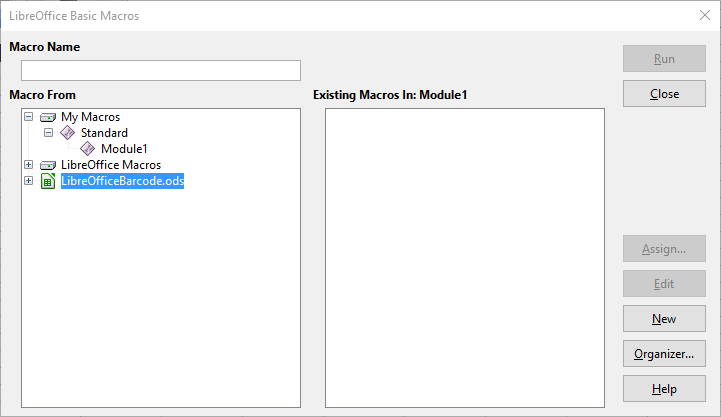
- In the macro from area, click on the name of the desired file and choose New. This will embed the macros and Visual
Basic source code into the file.
- Remove the Sub Main and End Sub lines that are automatically
added.
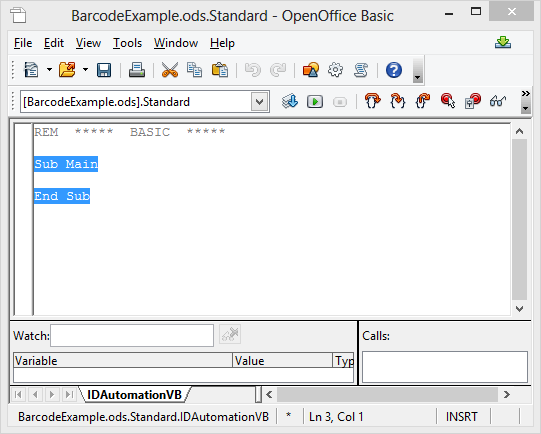
- Click on the Insert Basic Source button and choose the file
IDAutomationVB.bas provided in the
download. The Basic Source for all 2D fonts will be provided within that
particular package in the "Integration\OpenOffice VB" folder.

This will automatically add the code to the editor window. - Choose File - Save and File - Exit to exit the VB editor.
- Shut down all LibreOffice applications and install the IDAutomation barcode fonts. If unsure of what barcode font type to use, IDAutomation recommends the Code 128 Barcode Fonts.
Barcode Creation in Calc
- If the tasks in the Prepare LibreOffice
section have not been completed, do so now.
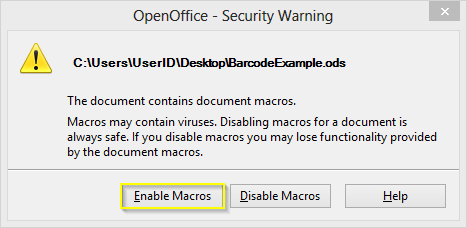
- When opening the spreadsheet with the macros imported, a Security
Warning will appear, choose "Enable Macros".
- Open Calc and Create an area in the spreadsheet column for the barcode.
Video Tutorial
- Size the column to make sure it is wide enough to contain the
entire barcode.
- Format the column so that any text appearing in it will be centered. This is necessary to create the white space (often called the quiet zone) before and after the barcode.
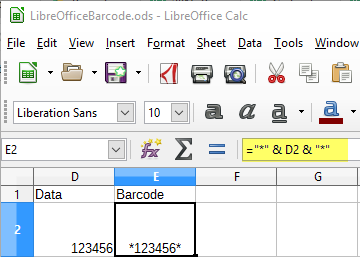
- Enter the formula in the cell that will format the data to the barcode font - this is where the barcode will appear. For use with
the Code 39
font, enter the formula of ="*" & A2 &
"*" in the cell.
- If unsure of which function or barcode to
use, IDAutomation recommends using the Code 128 fonts,
using the formula for OpenOffice =Code128(A2;0;0)
and LibreOffice =Code128(A2,0,0)
where A2 refers to the cell location
of the data to be formatted and encoded in the barcode.
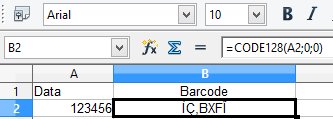
After entering the formula, the modified text that is to be formatted and encoded for the barcode font should appear in the cell with the formula.
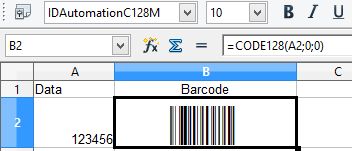
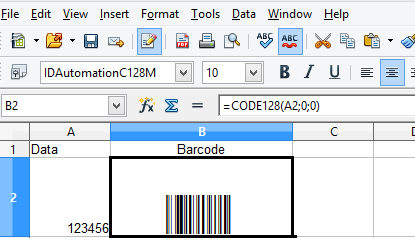
- Apply the applicable barcode font to the cell and size the cell
so there are at least 4 times the white space before and after the
barcode based on the thickest bar in the barcode.
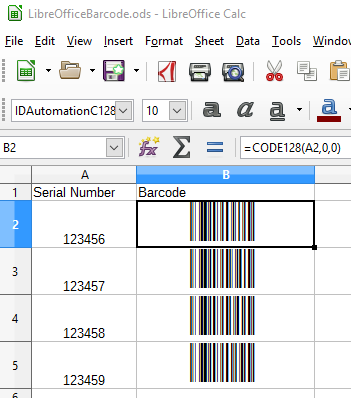
- To create barcodes for other cells in the column, select the
original cell and choose Edit - Copy and select the new cell or
cells, then choose Edit - Paste.
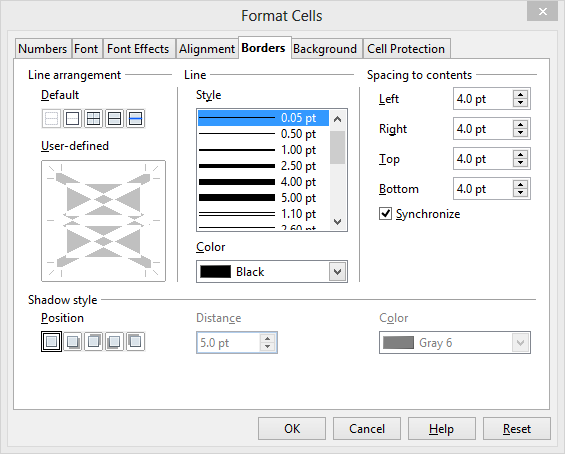
- To allow for easier scanning of barcodes in cells, select the
bar-coded cells and choose Format - Cells - Borders and set the spacing
to 4 points.
Barcode Mail Merge Creation in Writer
To create barcodes in a Writer mail merge using macros, it is necessary to use Calc as the data source. The field used for the data source in Writer should be the column in Calc where the formula has been applied, which is used to format the data to the barcode font. IDAutomation suggests using the last column of the spreadsheet in order to avoid any merging problems. To set up the Calc spreadsheet with the macros, please refer to the Calc Tutorial.
- In order to import the encoded data calculated in the Calc spreadsheet to
Writer, the Calc file will need to be saved in dBASE (.dbf) Format. The .ods
file will not retain this encoded information, the cells will only show a "0" in the encoded field. If the following pop-up is received, click "Keep Current
Format" to continue saving in dBASE format.
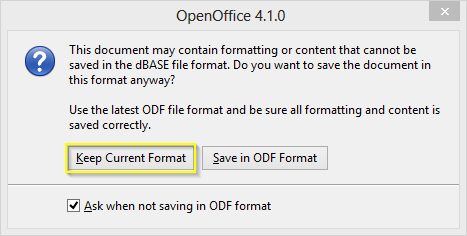
If you receive an error message that a JRE must be installed to proceed, visit OpenOffice.org for download information. - When asked what character set to save the DBase Export, select Western
Europe (Windows-1252/WinLatin 1).

- To begin the mail merge go to Tools - Mail Merge Wizard.
- First, select the starting document for the Mail Merge. In this
example, the current document will be used. Click Next.
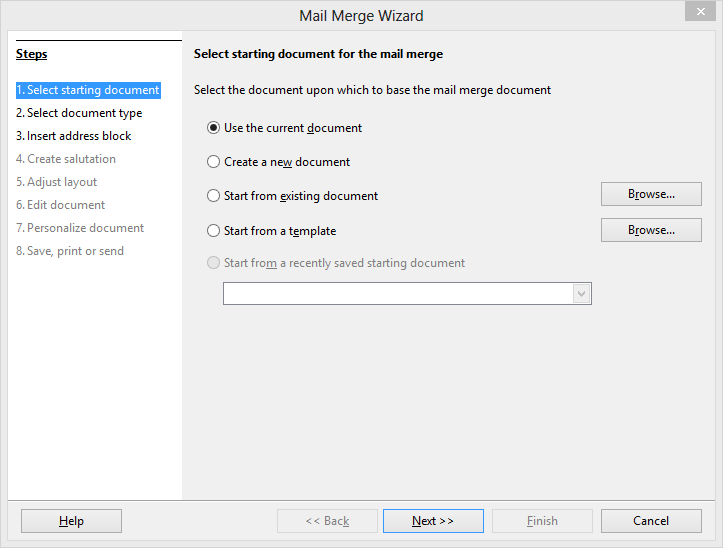
- The following screen will default to Letter. Click Next.
- On the Insert Address Block screen, click Select Different Address
List. The next screen will list the available Calc spreadsheets available to use.
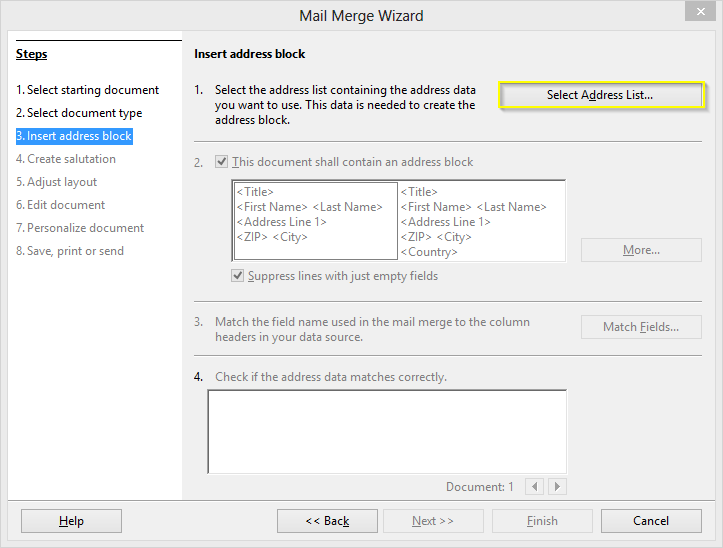
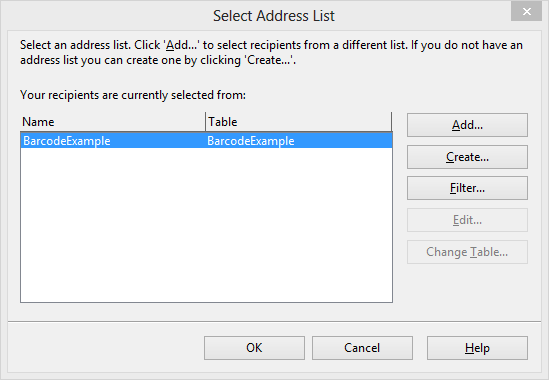
- Select the Name and Table from the list provided or choose data from a different location by clicking Add. A new table may also be created by selecting Create. Once the selection has been made,
Click OK.
- On the Insert Address Block screen, select "This document shall
contain an address block" and click "Match Fields".
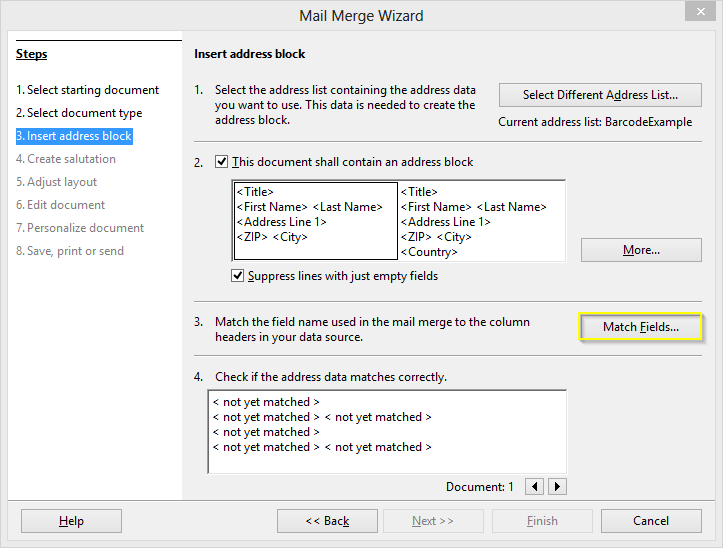
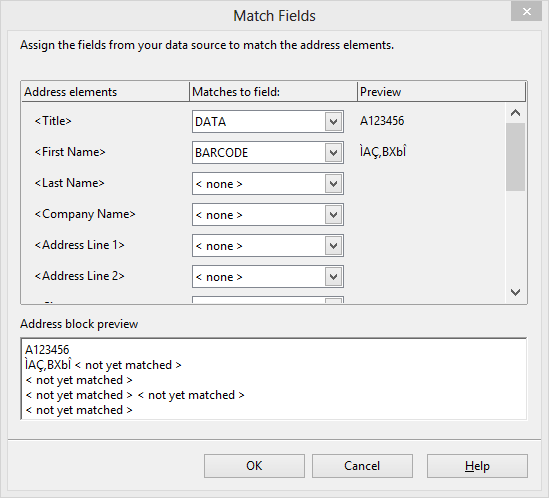
- Start with the first 'Address elements' field and match the fields wanted to the spreadsheet attached. Click OK.
- Now click on More and select Edit.
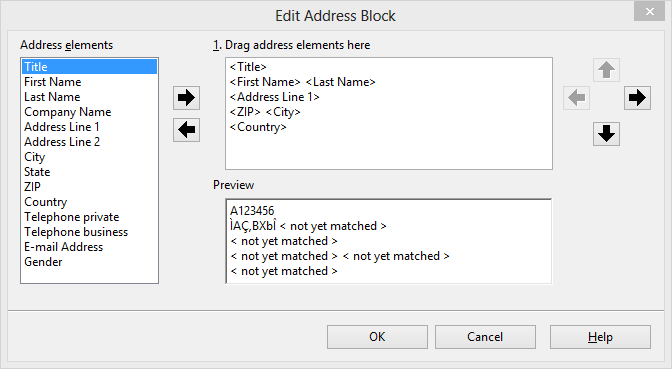
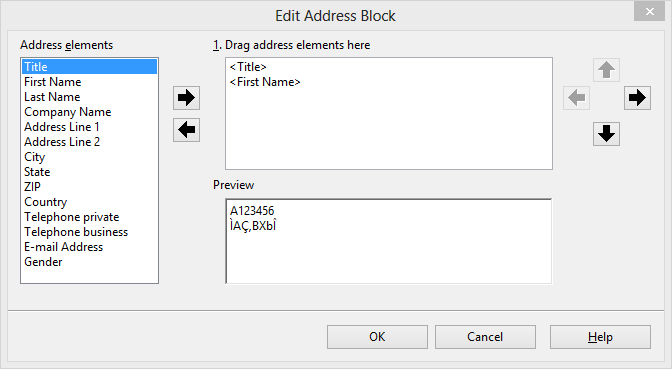
- Remove the address elements not mapped to the spreadsheet. Click
OK twice, then click Next.
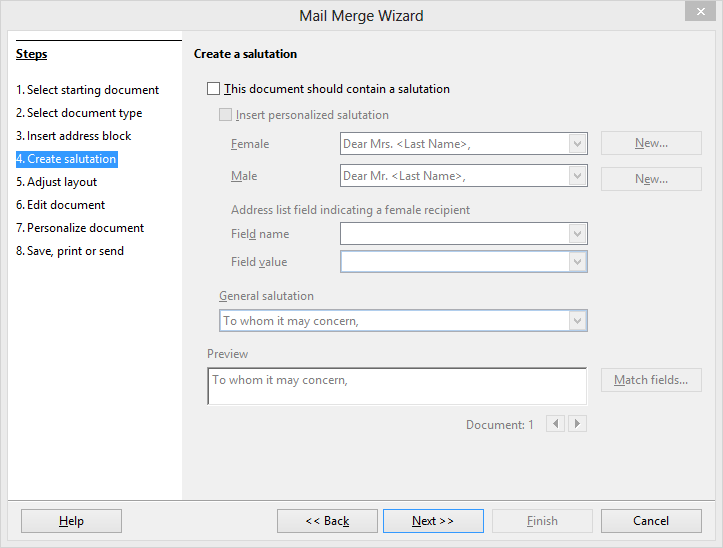
- The salutation should be disabled on the next screen.
- Skip Adjust Layout because it will be easier to move the barcode area on the next Edit Document screen, where the text box created may be manually aligned on the original Writer document.
- Edit Document will open a page with the frame example. This will be the time when the barcode font will be applied to the encoded data as well as adding any additional information to the document such as data fields if needed.
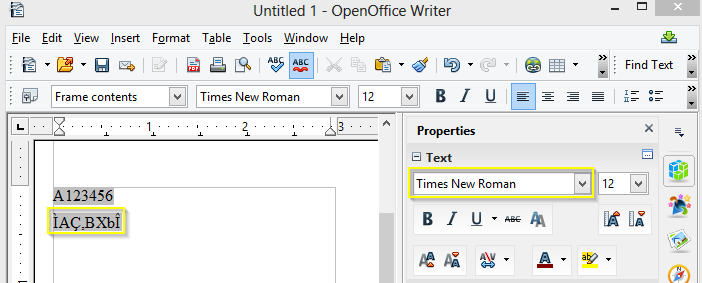
Highlight the encoded data and apply the barcode font.
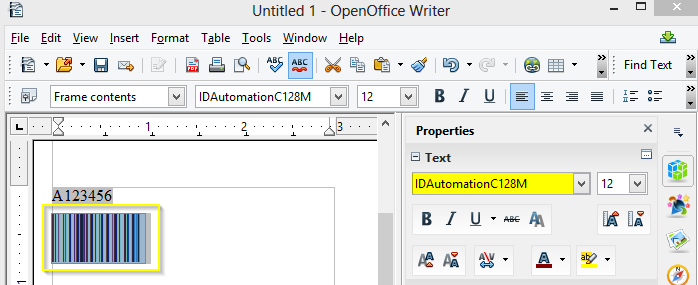
- Click Return to Mail Merge Wizard and the mail merge will be completed.

If specific notes need to be applied to individual pages in the merge, the Personalize Document screen will allow users to add notes to single pages. - The Print screen will save the document or print it out directly.
- After the merge is performed, print and scan the barcode(s)
to verify the correct data is encoded. If a scanner is needed to
verify barcodes, IDAutomation suggests the easy-to-use
USB
Barcode Scanners.
- When distributing the mail merge, the font should be embedded in Writer and the Calc data source must be accessible.
Barcode Creation in Base
Unfortunately, barcodes can not be generated directly out of Base, but barcodes can be generated by attaching to a spreadsheet created in Calc either saved as .xlsx or then saved as a dBASE (.dbf) Format as outlined in Step 1 above.
- Using the file created in Calc, verify that the file has been saved with the encoded text string not having the barcode font applied yet.
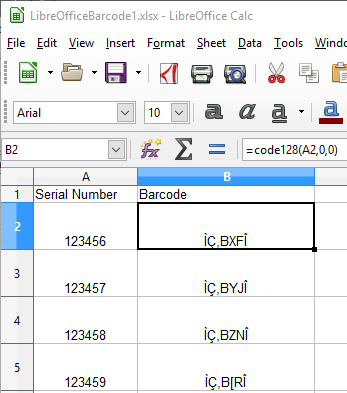
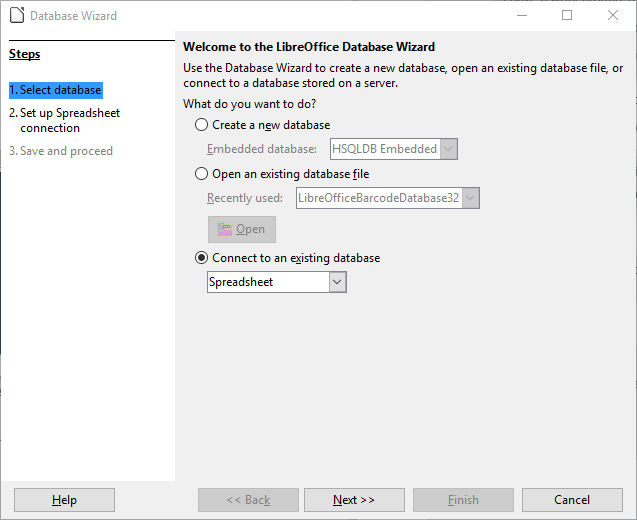
- Open Base and the Database Wizard, select "Connect to an existing
Database" and then "Spreadsheet" from the dropdown menu, and
Click Next:
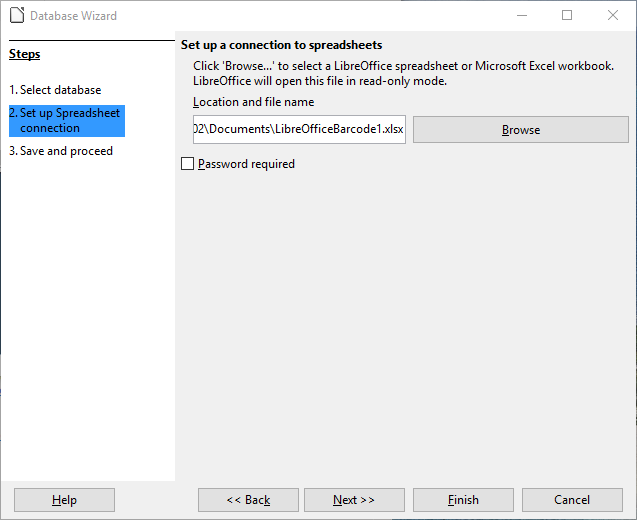
- Browse to the spreadsheet that includes the encoded data created in Calc:
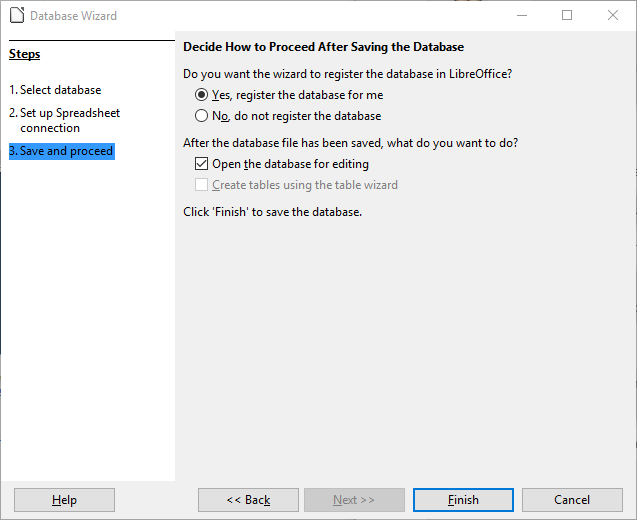
- Register the database on the following screen, click Finish, and save the file.
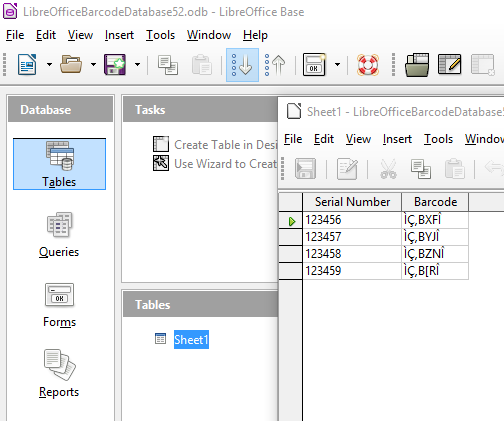
- Base will open the main screen with the new database data embedded.
- Click on Reports on the left panel and click on "Use Wizard to Create
Report", then choose the fields for the report, and update the Label names if desired. Options for Grouping, Sorting, and Layout follow to choose.
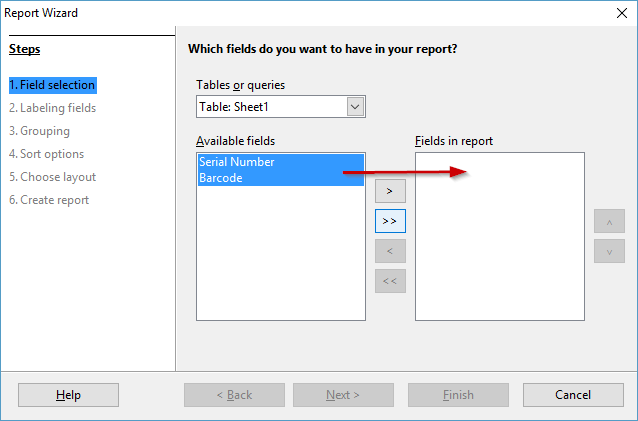
- Open the report to verify that the data is complete and accurate:

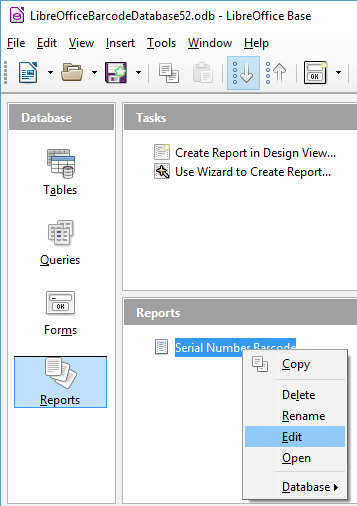
- Close out the preview and go back to the main report window. Right Click on the Report and select Edit.
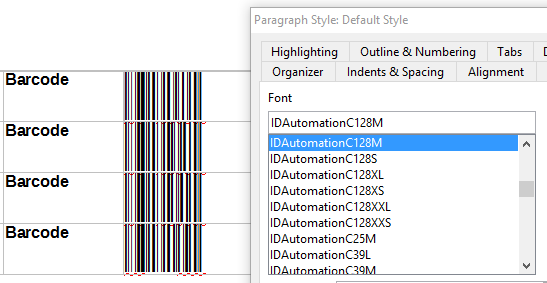
- Highlight the text below the Barcode Column heading and apply the appropriate
IDAutomation Font, as in this example the Code 128. Center the barcode so that there is enough white
space on each side of the barcode and increase the font size if needed:
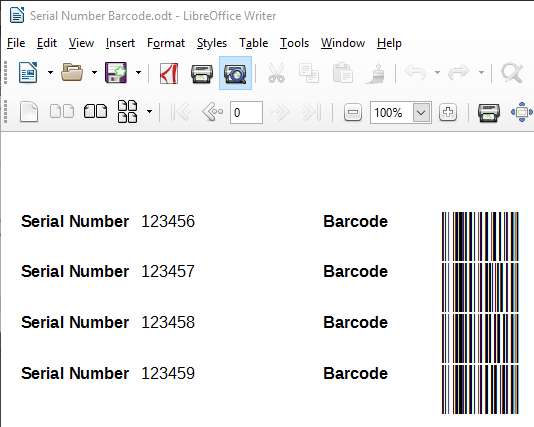
- Close the file and reopen the report in preview mode to see the barcode:
- Open the report to verify that the data is complete and accurate:
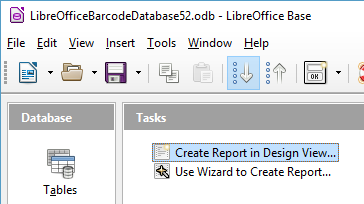
- An optional way to set up a report is to select "Create Report in Design View".
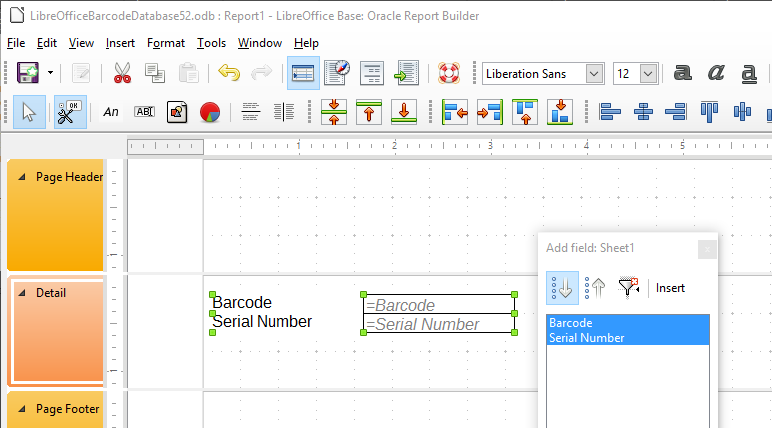
- Drag Fields onto Design View and align them as desired for the report.
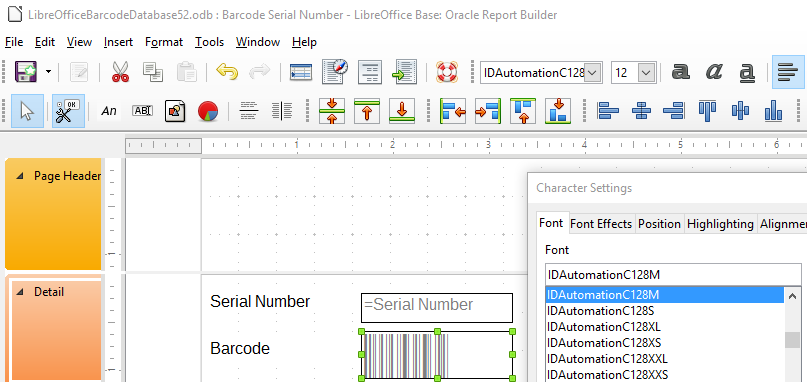
- Apply the appropriate barcode font to the field that has the previously
encoded data
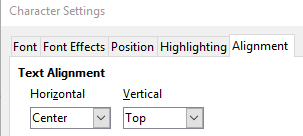
and Align the barcode center
- Save and close the design view, then open the preview to verify the
barcodes appear
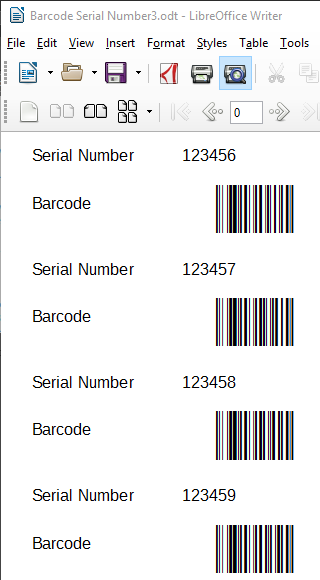
- Drag Fields onto Design View and align them as desired for the report.
The Following Barcode Macros are Available:
The barcode macros listed below are supplied in the file named "IDAutomationVB.bas" which is provided in the download package.
For all functions listed below, the DataToEncode is the string data type. Other data types, such as numbers or dates, may need to be converted to the string data type to be properly encoded. All parameters are required. For example, use Code128("123456"; 0; 0) instead of Code128("123456"). For all number symbologies, such as POSTNET and UPC, dashes or spaces may be imputed for easier readability, the dashes and spaces will be filtered out before the barcode is generated. For UPC-A, UPC-E & EAN-13, the +2 and +5 add-on codes may be created by adding the data to the end of the string.
| Function | Font to Use | Notes |
|
Code128(DataToEncode;
ReturnType; ApplyTilde) |
IDAutomationC128 |
It may be necessary to use the ReturnType and ApplyTilde for special purposes.
|
| Code128a(DataToEncode) | IDAutomationC128 | Caution: Entering a lowercase character will create a function. Use the character values 64 through 95 from set A to print characters, not on the keyboard; the scanner will recognize these functions as from set A. Formats output to the Code 128 barcode fonts. |
| Code128b(DataToEncode) | IDAutomationC128 | Returns codes formatted to the Code 128 character set B. Formats output to the Code 128 bar code fonts. |
| Code128c(DataToEncode; ReturnType) |
IDAutomationC128 | This code128 function "interleaves" numbers
into pairs for high density. (DataToEncode; 0) formats output to the Code 128 barcode fonts. (DataToEncode; 1) returns the human-readable text with the check digit included. (DataToEncode; 2) returns only the check digit. |
| Code39(DataToEncode) | IDAutomationC39 or IDAutomationHC39 |
Formats the output to print using Code 39 fonts. |
| Code39Mod43(DataToEncode; ReturnType) |
IDAutomationC39 or IDAutomationHC39 |
(DataToEncode; 0) performs the mod43 checksum
calculation for increased accuracy and then formats the output
to print using
Code 39
fonts. The mod43 checksum is usually required for LOGMARS
and HIBC applications. (DataToEncode; 1) returns the human-readable data with the check digit included. (DataToEncode; 2) returns only the check digit. |
| Code93(DataToEncode) | IDAutomationC93 | Formats the output to print with the 2 required check digits using Code 93 fonts. |
| Codabar(DataToEncode) | IDAutomationCB | Formats the output to print using Codabar fonts. |
| Code11(DataToEncode) | IDAutomationC11 | Formats output to the Code11 barcode fonts. Only the "C" check digit is calculated which is the standard when encoding 10 digits or less. |
| EAN13(DataToEncode) | IDAutomationUPCEAN | DataToEncode is a number string of 12, 13, 14, 15, 17, or 18 digits with or without a check digit, add-ons are supported. Formats output to the UPC/EAN barcode font. Entering incorrect data will create a barcode containing all zeros. |
| EAN8(DataToEncode) | IDAutomationUPCEAN | DataToEncode is a number string of 7 or 8 characters (EAN-8 without the check digit). Formats output to the UPC/EAN barcode font. Entering incorrect data will create a barcode containing all zeros. |
| I2of5(DataToEncode) | IDAutomationI25 or IDAutomationHI25 |
This function "interleaves" numbers into pairs for high density without check digits and formats the return string to the Interleaved 2 of 5 font. |
| I2of5Mod10(DataToEncode; ReturnType) |
IDAutomationI25 or IDAutomationHI25 |
(DataToEncode; 0) performs the mod10 checksum
calculation for increased accuracy and formats the return string
to the
Interleaved 2 of 5 font. MOD 10 checksums are required by
USPS for special services and for SSC-14 when using Interleaved
2 of 5 for that purpose. (DataToEncode; 1) returns the human readable data with the MOD10 check digit included. (DataToEncode; 2) returns the MOD10 check digit. |
| MOD10(DataToEncode) | not applicable | Returns the MOD 10 check digit for a given string of numbers according to the UCC/EAN method. |
| MSI(DataToEncode; ReturnType) |
IDAutomationMSI or IDAutomationHMSI |
(DataToEncode; 0) formats output to the
MSI barcode
fonts. (DataToEncode; 1) returns the human-readable data with the check digit included. (DataToEncode; 2) returns only the check digit. |
| RM4SCC(DataToEncode) | IDAutomationRM | Formats the output to print using RM4SCC fonts. Checksum calculated according to the mail sort customer bar-coding specification. |
| SpliceText(DataToEncode;
SpacingNumber; ApplyTilde) |
Text font | Returns text with a space inserted every SpacingNumber of digits to improve readability. If ApplyTilde is set to True, the tilde will be processed as described here. |
| UPCa(DataToEncode) | IDAutomationUPCEAN | DataToEncode is a UPC-A number string of 11, 12, 13, 14, 16, or 17 digits with or without a check digit, add-ons are supported. Formats output to the UPC/EAN barcode font. Entering incorrect data will create a barcode containing all zeros. |
| UPCe(DataToEncode) | IDAutomationUPCEAN | DataToEncode is a UPC-E number of 6, 7, or 8 digits or a UPC-A number string of 11, 12, 13, 14, 16, or 17 digits with or without a check digit, add-ons are supported only with 13, 14, 16 or 17 digits. Formats output to the UPC/EAN barcode font. Entering incorrect data will create a barcode containing "00005000000". UPC-E1 is supported when the first character is "1" instead of "0". |
| Universal Barcode Font Functions | ||
| All functions listed below are preceded with IDAutomation_Uni_. They may only be used with the IDAutomation Universal Barcode Font Advantage™ and are embedded in the IDAutomationUniversalOpenOfficeVBExample.ods spreadsheet provided within the Universal package. | ||
| Barcode Type | Universal Barcode Function Methods and Notes | |
| Code-128 |
IDAutomation_Uni_C128 (DataToEncode;
ApplyTilde) Note: Code128() is the recommended method to use. Code128() is also used to create GS1-128. IDAutomation_Uni_C128A (DataToEncode) IDAutomation_Uni_C128B (DataToEncode) IDAutomation_Uni_C128C (DataToEncode) IDAutomation_Uni_UCC128 (DataToEncode) Example: IDAutomation_Uni_C128 ("Ê8100712345Ê2112WH5678"; 1) Excel for Mac: idautomation_uni_c128 ("Ê8100712345Ê2112WH5678"; 1) Required Font: IDAutomation_Uni |
|
| not applicable | IDAutomation_Uni_C128HR (DataToEncode;
ApplyTilde) Returns text for Code 128 barcodes, such as for GS1-128. Required Font: Text Font |
|
| Code-39 |
IDAutomation_Uni_C39
(DataToEncode;
N_Dimension;
IncludeCheckDigit) Example: IDAutomation_Uni_C39 ("123456789"; 3; 1 ) Excel for Mac: idautomation_uni_c39 ("123456789"; 3; 1 ) Required Font: IDAutomation_Uni |
|
| Codabar |
IDAutomation_Uni_Codabar
(DataToEncode;
N_Dimension; CodabarStart; CodabarStop) Example: IDAutomation_Uni_Codabar ("123456789"; 3;"A";"B" ) Excel for Mac: idautomation_uni_codabar ("123456789"; 3;"A";"B" ) Required Font: IDAutomation_Uni |
|
| Interleaved 2 of 5 |
IDAutomation_Uni_I2of5 (DataToEncode;
N_Dimension;
IncludeCheckDigit) Required Font: IDAutomation_Uni |
|
| MSI / Plessey |
IDAutomation_Uni_MSI
(DataToEncode;
N_Dimension;
IncludeCheckDigit) Required Font: IDAutomation_Uni |
|
| SpliceText | IDAutomation_Uni_SpliceText(DataToFormat; SpacingNumber; ApplyTilde) | |
| MODU10 | MODU10(NumberData) | |
| ProcessTilde | IDAutomation_Uni_ProcessTilde(StringToProcess) | |
| 2D Functions (Included in Font and Encoder Packages) | ||
Regarding all symbologies listed in this section below:
|
||
| Barcode Type | Universal Barcode Function Methods and Notes | |
| QR-Code |
IDAutomation_QRFontEncoder(DataToEncode) Required Font: IDAutomation2D All parameters are set to default except ApplyTilde which is set to 1. |
|
| Data Matrix |
EncDM(DataToEncode;
ApplyTilde;
EncodingMode;
PreferredFormat) or EncNDM(DataToEncode; ApplyTilde; EncodingMode; PreferredFormat) EncNDM is the Native Code Module compatible with Windows and Mac; it is only provided with the Advantage Package License. Required Font: IDAutomation2D All parameters are set to default except Encoding Mode = ASCII and ApplyTilde = 1. | |

