SSRS Barcode Generation with the .NET Assembly
Legacy Product Notice:
IDAutomation now recommends using
SSRS Font
Encoders instead of the assembly in SSRS. The Font Encoders are much easier to use and do not require other components or config file
modifications. Generating barcodes in SSRS with the .NET assembly is no longer
recommended or supported.
To generate barcodes without fonts in SSRS,
IDAutomation recommends the
SSRS Native Barcode Generator.
This tutorial provides a walkthrough of steps for generating barcodes in Microsoft SQL Server Reporting Services and Visual Studio .NET environments. This can be accomplished by using IDAutomation barcode fonts in conjunction with an IDAutomation .NET Barcode Font Encoder Assembly.
Compatibility
- Visual Studio .NET 2003, 2005, 2008, 2010, and 2012
- SQL Server Reporting Services (SSRS) 2000, 2005, 2008, 2008R2, 2012 and 2014
- Microsoft .NET Framework 2.0 (minimum)
SSRS Barcode Font Tutorial Overview
IDAutomation includes the .NET Assembly with the purchase of a Developer License for any of our barcode font packages. The .NET Barcode Font Encoder Assembly & DLL file used in this tutorial formats the data-to-encode specifically for use with IDAutomation's barcode fonts and is designed to meet the specifications of the symbology laid out by the AIM and/or ANSI standards.
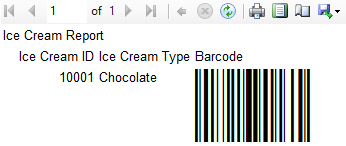
This example will demonstrate how to build an SSRS report based on the "Ice Cream" table of the Ice Cream Company database using the IDAutomation.NETAssembly.dll and Code 128 Barcode Font package. The report will include the database fields of Ice_Cream_ID and Ice_Cream_Type. A custom field will be added to the report, which will provide a Code 128 barcode representation of the Ice_Cream_ID.
SSRS Barcode Font Tutorial Applications and Components
- Visual Studio .NET 2012
- SQL Server Reporting Services 2012
- Code 128 Barcode Fonts
- IDAutomation.NETAssembly.dll (This is the linear version; 2D versions are included in their respective packages.)
- Ice Cream Company Database
| .NET Barcode Assemblies | Support Barcode Symbologies | Class Name / Function Name |
| IDAutomation.NETAssembly.dll * | Code 128, Code 39, Interleaved 2 of 5, UPCa, UPCe, and other supported Linear (1D) barcode symbologies. | Class Name: IDAutomation.NETAssembly.FontEncoder |
| Function Name: See Description ** | ||
| Universal Font Package, GS1-128 Font Package | Class Name: IDAutomation.NetAssembly.UniversalFontEncoder |
|
| Function Name: See Description ** | ||
| IDAutomation.IntelligentMail.dll * | Intelligent Mail/IMb | Class Name: IDAutomation.IntelligentMail.IntelligentMail |
| Function Name: FontEncode | ||
| IDAutomation.DataBarFontEncoder.dll * | DataBar, DataBar Limited, DataBar Expanded, DataBar Expanded Stacked, DataBar Stacked, DataBar Truncated, DataBar Omni Directional | Class Name: IDAutomation.Databar.Databar |
| Function Name: See Description ** | ||
| IDAutomation.Aztec.dll | Aztec Font & Encoder Advantage Package | Class Name: IDAutomation.Windows.Forms.AztecBarcode.AztecBarcode |
| Function Name: FontEncode | ||
| IDAutomation.DataMatrix.dll | Data Matrix Font & Encoder Advantage Package | Class Name: IDAutomation.Windows.Forms.DataMatrixBarcode.DataMatrixBarcode |
| Function Name: FontEncode | ||
| IDAutomation.PDF417.dll | PDF417 Font & Encoder Advantage Package | Class Name: IDAutomation.Windows.Forms.PDF417Barcode.PDF417Barcode |
| Function Name: FontEncoder | ||
| IDAutomation.QRCode.dll | QR Code Font & Encoder Package | Class Name: IDAutomation.Windows.Forms.QRCodeBarcode.QRCodeBarcode |
| Function Name: FontEncode |
* A demo of the Linear DLLs is included in the
.NET Assembly Font Encoder Download.
The 2D versions are included in their respective Demo Packages.
** Includes
functions for various barcode symbologies.
Reporting Services SSRS Barcode Tutorial
Set Up & Installation
- Download and install the purchased or demo barcode fonts on the printers,
servers, or computers where the barcode will be utilized. This example uses the
Code 128 Font Package.
- Download the
.NET Font Encoder Assembly. This example uses the
licensed version of the linear IDAutomation.NETAssembly.dll, which will be
included in the Font Encoder Developer Tools Zip File for those that purchase a
Developer's License and above.
- Copy the IDAutomation.NETAssembly.dll to the following directories:
%ProgramFiles%\Microsoft Visual Studio 11.0\Common7\IDE\PrivateAssemblies%Program Files%\Microsoft SQL Server\MSRS11.MSSQLSERVER\Reporting Services\ReportServer\bin
NOTE: For assistance on how to configure this solution for your environment, review Microsoft's Deploying a Custom Assembly article.
- Navigate to
%ProgramFiles%\Microsoft Visual Studio 11.0\Common7\IDE\PrivateAssemblies
and open the RSPreviewPolicy configuration file. The RSPreviewPolicy sets the Visual Studio to display the barcode during a Preview. If FullTrust is not granted to the code groups in this file, then the error message "That assembly does not allow partially trusted callers" will appear during the preview. Change the PermissionSetName from Execution to FullTrust.
In the RSPreviewPolicy.config file, place this code after the first CodeGroup:
<CodeGroup
class="FirstMatchCodeGroup" version="1" PermissionSetName="FullTrust" Name="IDAutomationNETAssembly" Description="This code group grants IDAutomationNETAssembly.dll Full Trust permission and allow Preview in Visual Studio."> <IMembershipCondition class="UrlMembershipCondition" version="1" Url="C:\Program Files (x86)\Microsoft Visual Studio 11.0\Common7\IDE\PrivateAssemblies\IDAutomation.NetAssembly.dll"/> </CodeGroup> - Navigate to
%ProgramFiles%\Microsoft SQL Server\MSRS11.MSSQLSERVER\Reporting Services\ReportServer
and open the rssrvpolicy configuration file.
In the rssrvpolicy.config file, place this code after the first CodeGroup:
<CodeGroup
class="UnionCodeGroup"
version="1"
PermissionSetName="FullTrust"
Description="This code group grants IDAutomationNETAssembly.dll Full Trust permission.">

<IMembershipCondition class="UrlMembershipCondition"version="1"
Url="C:\Program Files\Microsoft SQL Server\MSRS11.MSSQLSERVER\Reporting
Services\ReportServer\bin\IDAutomation.NETAssembly.dll" />
</CodeGroup>
-
Reboot the server or servers that
are running the Visual Studio and SQL Server Reporting
Services applications.
Tutorial
-
If adding the custom assembly to an existing report, skip to Step 19.
Otherwise, select File - New - Project.
-
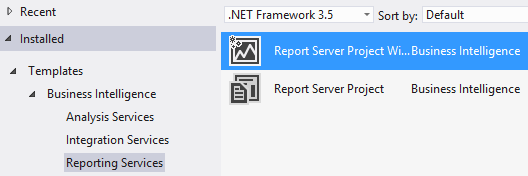
In the Templates, select Business Intelligence - Reporting Services - Report
Server Project Wizard.
-
Name the project and select OK.
-
In the Select the Data Source window, select New data source, create a Name, set
the Type of data source, and choose Edit.
-
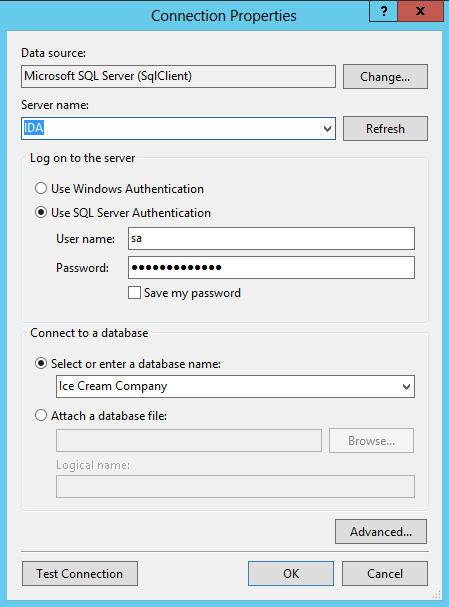
In the Connection Properties, select the Server name; log onto the server;
select or attach the database, and select OK.
-
To verify the connection is successful, select Test Connection. The
test results should display Test connection succeeded. Choose OK.
-
Select Next.
-
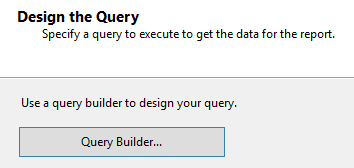
In the Design the Query, select Query Builder.
-
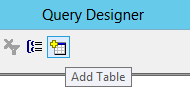
Select the Add Table icon.
-
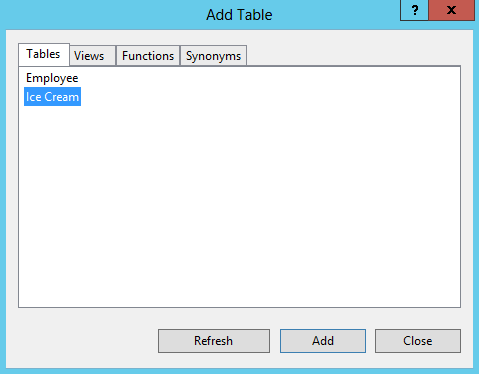
Choose the Table and click Add. Select Close.
-
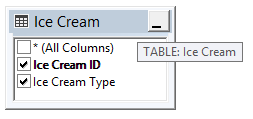
Place a checkmark in the box in front of the fields to include on the report and select OK.
-
Once the query string is set, select Next.
-
Select the report type and choose Next.
-
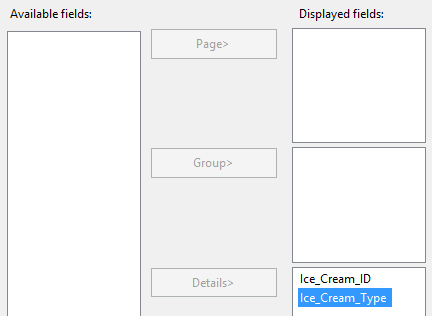
In the Design the Table window, move the Available fields to the Displayed
fields text area by left-clicking the field and selecting Details>. Select Next.
-
Choose the table style for the report and select Next.
-
Set the Report Server Version, Report Server, and Deployment Folder, and choose
Next.
-
Create a name for the report and choose Finish to complete the wizard.
-
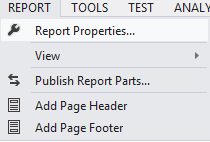
To activate the Report menu in the VS .NET IDE, left-click on the body of the
report. Select Report - Report Properties.
-
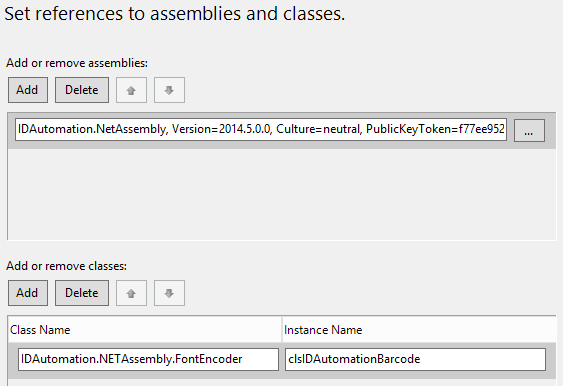
Select References. In the Add or Remove assemblies, select Add and
then select the ellipsis button (
 ).
). -
Select the Browse tab, choose the IDAutomation.NETAssembly.dll, and select OK.
-
In the Add or Remove classes, set the Class Name containing the data-encoding
functions. For the IDAutomation.NETAssembly.dll, use
IDAutomation.NETAssembly.FontEncoder. This value is pulled directly from
the assembly file.
-
Set an instance name and select OK. This tutorial uses clsIDAutomationBarcode. (Additional
DLL Required for 2D)
-
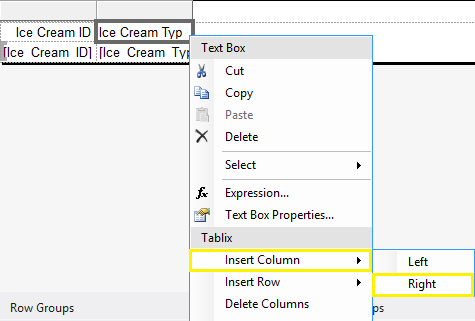
To add an encoded data field to the report, right-click the last column in the
table and select Insert Column - Right. Name the field "Barcode."
-
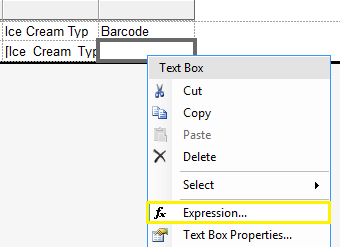
Right-click the empty area below the Barcode field and select Expression.
-
Enter =Code.clsIDAutomationBarcode.Code128(Fields!Ice_Cream_ID.Value).
The format of the expressions is: =Code.InstanceName.FunctionName(parameter) where:- Code is a global module for processing custom code requests,
- InstanceName is the instance of the class variable assigned,
- FunctionName is one of the functions available and the parameter is the data that needs to be encoded
into a barcode.

-
Select OK.
-
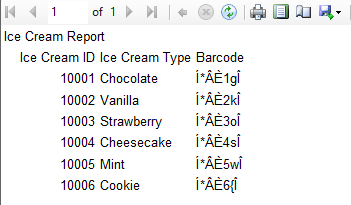
Click the Preview tab to ensure that the function is returning data. Depending
on the barcode type encoded, the data may appear as strange characters, numbers,
or uppercase letters. This is the encoded data.
-
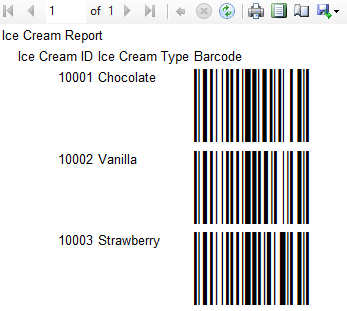
Return to Design view. In the Expression, right-click and select Text Box
Properties. Choose Font and set the font to
IDAutomationC128M (or the demo font IDAutomationSC128M). Select OK.
-
Preview the SSRS report.
- To deploy the solution to the Report Server, select Build - Deploy Solution. For guidance on how to set up deployment, view Microsoft's How to Set Deployment Properties article.
2D SSRS Barcode Additional Setup Requirements and Examples
System DLL Required
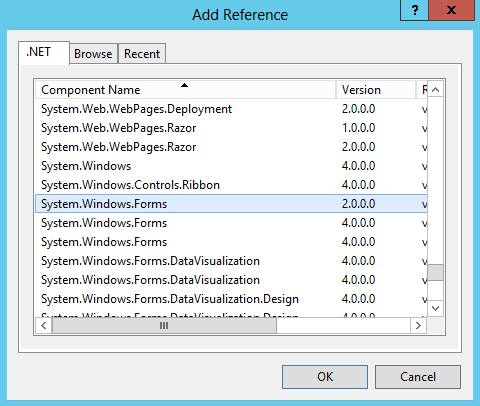
Because each 2D Barcode .NET DLL is built as a .NET Forms Control, a
reference to the System.Windows.Forms.dll is required. After Step 22, choose Add and
then select the ellipsis button (
 ). Select the .NET tab, choose the System.Windows.Forms.dll, and select
OK.
Function Names and Recommended Encoding Parameters for SSRS Barcode Generation
Step 25 explains how to input a global module, create an instance of the class, and enter the function name. The encoder function in each 2D .NET DLL is composed of several parameters that require values. The recommended settings for each symbology's function are listed under the symbology name.
Aztec:
=Code.InstanceName.FontEncode(DataToEncode,false,0,false)
Data Matrix:
=Code.InstanceName.FontEncode(DataToEncode,false,0,0)
PDF417:
=Code.InstanceName.FontEncoder(DataToEncode,0,0,0,false,PDF417Barcode.PDF417Modes.Text,true)
QRCode:
=Code.InstanceName.FontEncode(DataToEncode,false,EncodingModes.Alphanumeric,Versions.Auto,ErrorCorrectionLevels.H)
NOTE: DataToEncode is the data field to format as the barcode.
SSRS Barcode Technical Support
Known SSRS Barcode Generation Issues
- Assembly does not allow partially trusted callers
- '#Error' in Deployed Report using IDAutomation.NETAssembly.dll
- Parameters for 2D .NET DLLs
- 'An error occurred during local report processing. already exists.'
Additional Support Methods
- Search the IDAutomation Public Forum for similar issues that have been resolved.

